How to Repair Drywall After Removing a TV Mount

How to Repair Drywall After Removing a TV Mount
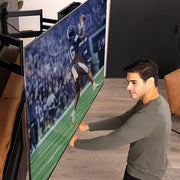
When you take down a wall‑mounted TV, you’re going to be left with a constellation of drywall holes. Besides being ugly, these holes can allow pests and moisture in. Fortunately, repairing drywall after a TV mount was taken down is a straightforward project.
⚒️ You will need
-
Spackle or joint compound
-
Drywall patches
-
Tape
-
A putty knife
-
Sanding sponge
-
Primer
-
Paint
Sanding produces fine dust, so consider wearing a respirator and eye protection. Don’t forget to cover your floors, seal off nearby rooms and mask adjacent surfaces with painter’s tape.
‼️Safety matters
If the hole exposes electrical wiring or you’re uncomfortable cutting drywall, consider hiring a professional.
Tiny drywall holes
Tiny nail holes from picture hooks can be filled with a lightweight spackle using your fingertip or a putty knife. Simply apply, and then scrape off any excess. Once dry, lightly sand the spot and touch up with matching paint.
Medium drywall holes (up to 4 inches)
Small to medium holes (like those left by drywall anchors or screws) require a bit more work:
-
Use a utility knife to square off the edges of the hole and remove any loose paper.
-
Apply a self-adhesive mesh patch over the opening, then spread a thin layer of joint compound with a putty knife.
-
Feather the edges to blend into the surrounding wall. Let it dry, sand lightly and touch up with matching paint.
Drywall repair for large holes
Holes larger than 4 inches should be fixed with some kind of backing/support. Follow these step-by-step instructions:
-
Cut a rectangular piece of drywall slightly larger than the hole and trace its outline on the wall.
-
Score along the outline and remove the damaged section.
-
Cut a piece of wood, such as a 1x2 furring strip, longer than the hole. Insert it through the opening and screw it to the existing drywall on either side so it acts as a brace.
-
Screw the new drywall patch into the wood support, then tape the seams with paper or mesh tape.
-
Apply several thin coats of joint compound, sanding between layers. Always let the compound dry completely before sanding — this can take a few hours or overnight, depending on the humidity.
-
After the final sanding, wipe the area with a damp cloth to remove dust.
-
Prime the patched surface with a stain-blocking primer (don’t skip this step, because raw joint compound absorbs paint differently than drywall).
-
Once the primer dries, paint the wall, feathering the paint out beyond the patch to blend it.
Matching the texture
For these walls, matching the wall texture is often the hardest part. Try these tips:
-
For orange peel or knock-down finishes, try a spray-on texture in a can — just make sure to practice on a scrap piece of drywall before applying to your wall.
-
For heavy textures, you might need a hopper gun or to apply joint compound with a stomp brush. Once dry, lightly knock down any sharp points with a drywall knife before priming and painting.
With the right materials and patience, you can restore your walls and prepare them for a fresh installation, whether you’re hanging a new TV mount or returning the wall to its original state.
>> Transform your space with MantelMount pull-down TV mounts
Leave a comment
Please note, comments must be approved before they are published.