MantelMount

Big Screen, Small Space: Clever Layout Hacks for Small Living Rooms
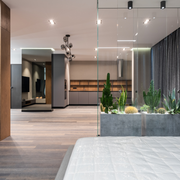
Big Screen, Small Space: Clever Layout Hacks for Small Living Rooms Trying to fit a big TV into a small living room? It’s a bit of a design challenge, but others have gone before you, and we’ve learned from their experience. Here are the best design ideas for small living rooms with big screens. Screen size and viewing distance When selecting a TV for a small room, size and distance are crucial. A 50‑inch television may be too large if you sit less than 6 feet away, whereas a 43‑inch model usually strikes a balance between immersion and comfort. Use a viewing‑distance calculator to find the sweet spot. When in doubt, scale down — modern displays still offer crisp images at 40 inches or less. Mount the TV Mounting the TV eliminates the need for a TV stand and makes the room look cleaner and more organized. Opt for a slim mount that keeps the screen close to the wall. For TVs between 45-90 inches, consider the MAX1 full-motion TV mount with vertical travel. Think vertically to maximize space. Consider a built-in TV niche to recess the TV, or mount it over a floating cabinet that stores electronics and cables. In rooms with low ceilings, placing the TV slightly off‑center allows you to keep the screen at eye-level while avoiding neck strain. Try a hidden TV solution A frame TV transforms the screen into a piece of art when not in use. There are also mirror TVs, sliding panels, and flush and recessed mounts. If you can’t invest in one of these specialty TVs, hang artwork or a mirror on the opposite wall to draw the eye away from the television. >> Read More: Ultimate Guide to Mirror TVs & Hidden Television Solutions 💡 MantelMount Pro Tip Paint the wall behind the television in a dark color, so the TV’s black screen blends into the background. This simple trick hides the TV when it’s off and makes the room feel more sophisticated. Choose your furniture wisely Surround the TV with built‑in shelves or bookcases to help balance its visual weight and provide storage. Some pieces can also do double-duty. For example: Look for an ottoman with hidden storage that can also act as extra seating. Nesting tables slide out when guests arrive and tuck away when you need floor space. A wall-mounted fold-down desk can double as a console when closed and as a workspace when open. In more open floorplans, use a low bookcase or console behind the sofa to delineate the living area without closing off the room. Mirrors and lighting Mirrors reflect light and give the illusion of depth. Consider putting one across from a window to bounce natural light into the room. Layer lighting with a combination of floor lamps, table lamps, and wall sconces to create warmth without sacrificing floor space. Backlighting built into shelves or behind the TV not only adds ambience but also reduces eye strain when watching at night. Good cable management is essential Small living rooms look especially cluttered when cords are everywhere. To that end: Conceal wires in cord covers painted the same color as the walls or run them through baseboards. When mounting your TV, use a wall plate with brush openings to route cables directly into the wall cavity. Connect streaming devices via Wi-Fi to reduce the number of boxes. If you must place equipment on a shelf, choose pieces with integrated cable management channels. Get started with a MantelMount TV mount Are you ready to design an incredible living room, even with that big TV? MantelMount offers pull down mounts and accessories that let you lower your TV to proper eye-level and swivel left or right. Compare MantelMounts today.

How to Host the Ultimate Game-Day or Holiday Movie Party
How to Host the Ultimate Game-Day or Holiday Movie Party You have this epic home theater setup, right? Now it’s time to gather everyone together for a sports or holiday movie-watching party. This guide walks you through every consideration. Choose the right display While quality time together is the ultimate goal, the television IS the visual focal point of the day. For sports-watching parties, look for a TV with a high refresh rate (120 Hz or more) and low input lag, so fast‑moving plays remain smooth. OLED panels offer deep blacks and wide viewing angles, while LED sets are brighter for daytime parties. For outdoor parties, you can mount a TV outdoors, or consider renting a projector and inflatable screen. You’ll need speakers for the sound to fill the space. ⚙️ Prepare for these day-of logistics: Remember to calibrate the TV for sports or movie mode. Adjust motion smoothing, color temperature and brightness for your room. Test all streaming services or cable connections ahead of time, making sure apps are updated and you have all the login credentials you’ll need. If you’re watching a live event, verify your internet speed and consider using a wired connection for reliability. Connect a Bluetooth speaker or use a soundbar for large gatherings. Make sure to position it below the TV so the sound distributes evenly. Keep remotes handy and labeled, or consolidate them with a universal remote, so anyone can adjust volume or change inputs. >> Hosting Football Season with the Perfect View: Why a Full-Motion TV Mount Is a Game Changer Seating, food and drink Perhaps somewhat obviously, arrange the furniture so every guest has a clear view. Consider adding a second row of bar stools or folding chairs for large groups. Place side tables or trays within reach. You can do finger foods like sliders, dips and charcuterie boards. We’re big fans of potlucks, too; not only do they reduce your workload, but going potluck-style adds variety to the menu. Set up a self-serve bar so guests can refresh without missing the action. Offer a mix of alcoholic and non-alcoholic drinks, and don’t forget plenty of water. For a fun twist, create a signature cocktail inspired by the team you want (or holiday). Don’t forget to label dishes for dietary restrictions (eggs, dairy, wheat, etc.) and keep trash and recycling bins accessible. Music, mood and decorations Make it cozy! Use your TV to display a digital fireplace or a slideshow of family photos when the game or movie isn’t on. Curate a playlist of background music for pre- and post-game socializing. Set up a photo booth area with themed props, so guests can capture memories. 🤩 Make It Yours Don’t be afraid to infuse your personality into the décor. Some tips here: For sporting events, decorate using your team’s team colors in the paper plates, plasticware, napkins and balloons. For holiday specials, decorate the TV area with garlands, fairy lights and seasonal centerpieces. Provide a basket of cozy blankets. Finally, remember that the goal of any viewing party is to spend quality time with the people you care about. Make it into a memorable celebration. Get more great ideas for enjoying your home theater on the MantelMount blog.

How to Create a Multi-Room TV Setup Using an HDMI Splitter
How to Create a Multi-Room TV Setup Using an HDMI Splitter You want to watch what you want, where you want, right? The problem is, so do your kids. And your spouse. And roommates. Probably even the dog. With a multi-room TV setup, everyone can watch their preferred shows in different rooms — all from the same subscription and without having to pay for multiple cable boxes. You can also watch the same content on multiple TVs across your home, which is perfect for hosting watch parties. Keep everybody happy, enjoy greater convenience and throw phenomenal parties — all by sharing a cable box to multiple TVs. Your signal distribution options 1. Send the same signal to two TVs On the simple (and least expensive) end, you can use a basic HDMI splitter to send the same signal to two nearby TVs. This solution requires running an HDMI cable to the second room, and it works best when both TVs are close to the source. For longer distances or older homes with coaxial wiring, a digital modulator converts HDMI to a channel that any TV can tune into. To install: Connect the source to the modulator Attach the modulator to your home’s coax network Tune the TV to the assigned channel 2. Send different sources to different TVs You can also share different content to different TVs using an HDMI matrix switch, which allows multiple inputs and outputs. 3. Go wireless If cords aren’t your thing, consider a wireless HDMI extender. They transmit video signals through walls without using cables, though beware — they may introduce a slight lag. Sound quality in a multi‑room TV system Think about audio distribution as well. Your options include: A central receiver with speaker zones — this lets you send synchronized sound to different rooms Wireless systems such as Sonos, Bose SoundTouch or HEOS by Denon — these make it simple to group speakers together. You can route TV audio through the speakers, so the TV’s sound follows you throughout the house. For a truly seamless experience, install in-ceiling or in-wall speakers and run speaker wire through the walls. 🤔 MantelMount Pro Tip For network streaming, connect as many devices as possible via ethernet to avoid Wi-Fi congestion. If rewiring walls isn’t an option, consider powerline adapters that transmit data over your home’s electrical wiring. Who has the remote!? If you use an HDMI splitter for multiple TVs, think about the remote control. With a modulator or splitter, the source box remains in one room, so you’ll need an infrared repeater or RF remote extender to change channels from another room. Consider investing in a universal remote or smart-home hub that can command all your devices from any room. Many modern TVs and streaming boxes integrate with voice assistants like Alexa or Google Assistant. This means you can start a movie in the living room, pause it, and resume in the bedroom with a simple voice command. One last thing: Legal considerations and ISP policies Before you split your cable signal, review your service agreement. Providers sometimes restrict redistributing their content. Always aim for quality Wiring and network infrastructure are the backbone of a multi-room viewing setup. Use high-quality HDMI or coaxial cables rated for the distances you need, and keep in mind that long runs may require active cables or signal boosters. With the right hardware and a clear understanding of your needs, you can create a multi‑room TV system that everyone loves. For more inspiration, check out the MantelMount blog.

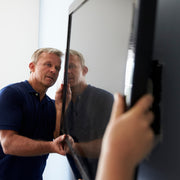
How to Repair Drywall After Removing a TV Mount
How to Repair Drywall After Removing a TV Mount When you take down a wall‑mounted TV, you’re going to be left with a constellation of drywall holes. Besides being ugly, these holes can allow pests and moisture in. Fortunately, repairing drywall after a TV mount was taken down is a straightforward project. ⚒️ You will need Spackle or joint compound Drywall patches Tape A putty knife Sanding sponge Primer Paint Sanding produces fine dust, so consider wearing a respirator and eye protection. Don’t forget to cover your floors, seal off nearby rooms and mask adjacent surfaces with painter’s tape. ‼️Safety matters If the hole exposes electrical wiring or you’re uncomfortable cutting drywall, consider hiring a professional. Tiny drywall holes Tiny nail holes from picture hooks can be filled with a lightweight spackle using your fingertip or a putty knife. Simply apply, and then scrape off any excess. Once dry, lightly sand the spot and touch up with matching paint. Medium drywall holes (up to 4 inches) Small to medium holes (like those left by drywall anchors or screws) require a bit more work: Use a utility knife to square off the edges of the hole and remove any loose paper. Apply a self-adhesive mesh patch over the opening, then spread a thin layer of joint compound with a putty knife. Feather the edges to blend into the surrounding wall. Let it dry, sand lightly and touch up with matching paint. Drywall repair for large holes Holes larger than 4 inches should be fixed with some kind of backing/support. Follow these step-by-step instructions: Cut a rectangular piece of drywall slightly larger than the hole and trace its outline on the wall. Score along the outline and remove the damaged section. Cut a piece of wood, such as a 1x2 furring strip, longer than the hole. Insert it through the opening and screw it to the existing drywall on either side so it acts as a brace. Screw the new drywall patch into the wood support, then tape the seams with paper or mesh tape. Apply several thin coats of joint compound, sanding between layers. Always let the compound dry completely before sanding — this can take a few hours or overnight, depending on the humidity. After the final sanding, wipe the area with a damp cloth to remove dust. Prime the patched surface with a stain-blocking primer (don’t skip this step, because raw joint compound absorbs paint differently than drywall). Once the primer dries, paint the wall, feathering the paint out beyond the patch to blend it. Matching the texture For these walls, matching the wall texture is often the hardest part. Try these tips: For orange peel or knock-down finishes, try a spray-on texture in a can — just make sure to practice on a scrap piece of drywall before applying to your wall. For heavy textures, you might need a hopper gun or to apply joint compound with a stomp brush. Once dry, lightly knock down any sharp points with a drywall knife before priming and painting. With the right materials and patience, you can restore your walls and prepare them for a fresh installation, whether you’re hanging a new TV mount or returning the wall to its original state. >> Transform your space with MantelMount pull-down TV mounts

Turn Your Tablet into a Wall-Mounted Smart-Home Hub in Every Room
Turn Your Tablet into a Wall‑Mounted Smart‑Home Hub in Every Room We love our smartphones, but if you’re like us, they tend to go missing fairly regularly (i.e., up to several times a day). A wall‑mounted screen is always in the same spot, ready to display the weather, family calendars, or a home assistant dashboard. Learn how to choose the right device, mount it safely and integrate it into your home. Choose your device First decision: Do you want a dedicated smart display (such as the Echo Show or Google Nest Hub) or a tablet like an iPad? Consider: Smart displays integrate tightly with voice assistants, but they may have limited customization. Tablets allow you to run a variety of dashboard apps and streaming services. Whichever you choose, ensure the screen is large enough to read at a distance and supports landscape orientation. Select a mounting solution Your options here include a flush frame, a recessed wall frame, or an articulating arm. Flush frames and recessed enclosures keep the device nearly flush with the wall for a built‑in look, while articulating arms let you angle the screen and remove it for handheld use. Use a magnetic dock for quick attachment and removal. When planning your installation, think about power: an in‑wall charger for tablets or PoE injector can supply continuous power while hiding cables. ⚡Reminder: If you run a cable through the wall, follow electrical codes and use a cable management kit. How to mount a tablet on the wall Mount the device at a comfortable height, typically around eye-level (48–54 inches from the floor) for standing users or lower if children will use it. Use a stud finder to anchor heavy tablets securely, or choose appropriate drywall anchors. Once installed, set up your smart home dashboard apps and configure shortcuts to lights, music, security cameras and other smart devices. Enable guided access or kiosk mode so the tablet only runs the dashboard, and set a passcode to prevent tampering. Mounting techniques Mounting techniques vary by type of mount and surface. Adhesive mounts work on smooth tile or glass, but they may not stick to textured walls; swivel mounts allow you to adjust viewing angles, which is particularly useful in kitchens where you move around while following a recipe. Smart home wall display ideas Kitchen: A wall-mounted tablet becomes a digital cookbook and meal planner. Use it to watch cooking videos, follow step-by-step recipes, or manage grocery lists that sync with your phone. Install a mount near an outlet but away from splashes. For added convenience, use a case with a detachable magnetic plate, so you can remove the tablet for hands-on use and reattach it when done. Bathroom: A moisture-resistant smart display mounted outside the shower lets you listen to podcasts or check your morning news while getting ready. When selecting a mount, choose one with an enclosure that protects against humidity. Bedrooms: In bedrooms, tablets can function as alarm clocks, white-noise machines and smart-home controllers. Consider mounting them at nightstand height near your bed for easy access. Laundry room: Mount a tablet to monitor smart appliances and receive cycle notifications. Home gym: A wall-mounted display can stream workout classes, track reps and heart rate, and provide motivational music. Garage: Use one to watch DIY tutorials while you work, keep an inventory list of tools and materials, or manage a smart sprinkler system. 🤔 MantelMount Pro Tip: Good cable management To maximize the lifespan of your devices, invest in cable management solutions that prevent cords from bending or fraying. Velcro ties, cable clips and raceways keep charging cables neat and protect them from pets and vacuums. In rooms where outlets are scarce, use multi-port charging stations mounted discreetly under cabinets or shelves. This way, you get to consolidate power for multiple devices and reduce clutter. Don’t forget privacy matters Make sure you don’t place devices where cameras could capture sensitive activities. Use built-in privacy shutters on smart displays and choose devices that support on-device processing for voice commands. Most systems let you manage the user profiles, so family members see customized content. Periodically review app permissions and update firmware to maintain security. Installing smart displays is a journey, not a destination As new devices come onto the market, evaluate which features suit your lifestyle. By strategically mounting tablets and displays throughout your home, you create a responsive environment that adapts to your lifestyle, improves efficiency and adds a touch of modern convenience to every room. >> Get more great home content on the MantelMount blog

Find the Perfect TV Mounting Height to Avoid Neck Strain
Find the Perfect TV Mounting Height to Avoid Neck Strain What’s the best height to mount a TV? This article explains how to calculate the ideal height for your wall-mounted TV and choose a mount that keeps you comfortable. Step 1: Measure Begin by measuring the height of your eyes when seated on your sofa or chair. The midpoint of the screen should be at or slightly below this height. For example: If your eye-level is 44 inches from the floor, and you have a 50‑inch TV (with a vertical screen height of about 24 inches), mount the TV so the center sits around 44 inches. 🤔 MantelMount Pro Tip: When mounting above a fireplace or in a bedroom, where you watch from a reclined position, you may need to mount the TV higher but tilt it downward using a tilt or full‑motion mount to maintain a comfortable viewing angle. >> Read More: Mounting Your TV on Brick or Stone Screen size and viewing distance Larger screens appear lower when viewed from farther away, so you may not need to mount them as high. Conversely, a small TV in a narrow room may need to be slightly higher to stay in your line of sight. To simplify planning, use a mounting height calculator that factors in screen size, viewing distance and seat height. Viewing distance is just as important as height when it comes to comfort. Follow this simple formula to estimate the best viewing distance: >> Measure the diagonal size of your TV and multiply by 1.5 to 2.5. For example, a 50-inch screen is best viewed from about 6 to 10 feet. Different mount types A fixed mount holds the TV flush against the wall, which is ideal when the screen sits at perfect eye-level. A tilting mount lets you angle the screen downward if you must mount it higher, such as above a fireplace. Then there are full-motion mounts. A note about those: 💡 Before You Buy, You Should Know Traditional full-motion mounts only provide outward movement from the wall, horizontal swivel articulation left and right, and in most cases, tilt. They do not move vertically. If you want a TV mount that also travels vertically, try the MantelMount MAX1. This mount features our maximum range of motion in all directions and flushest TV-to-wall appearance. >> Compare MantelMounts: Review side-by-side features and specs Choose lighting that reduces eye strain A bright room can cause glare, while a dark room can increase eye fatigue. Consider using layered lighting, such as wall sconces or LED strips behind the TV, to reduce contrast. Bias lighting, which is installed behind the screen, provides a gentle backlight that eases eye strain without washing out the image. Most bias lighting kits are affordable and USB-powered, which means you can sync them with your TV. Calibrate your television Many TVs ship with vivid or dynamic picture modes that oversaturate colors and boost brightness to stand out in a showroom. For home use, switch to a cinema or calibrated mode to obtain more accurate colors and softer light output. You can adjust brightness, contrast and backlight levels to suit your environment. Lowering sharpness prevents harsh edges that can irritate eyes. Comfort is dynamic As seasons change or as you switch furniture, revisit your TV setup to ensure it still works. And remember — regardless of mount type, ensure you use studs or proper anchors to support the weight. >>MantelMount Offers the Perfect Pull-Down TV Mount for You

Interior Designers’ Takes: How to Balance Your TV With Your Décor
Interior Designers’ Takes: How to Balance Your TV With Your Décor Most interior designers have a love-hate relationship with televisions. The TV is often the focal point of family time — and who doesn’t love togetherness? But for aesthetics, most designers cringe. It’s hard to decorate around a big black box. These clever techniques let you hide your TV or integrate it into your décor. This article explores the options for decorating around a TV, ranging from sliding TV panels and gallery walls to mirror TVs and pull-down TV mounts. TV concealment solutions Sliding panels and barn doors: Install sliding artwork or bifold shutters to hide the TV when not in use. Panels can match your wall color or feature a painting. Ensure there’s enough clearance on either side of the TV and that the track is strong enough to support the weight. Pop‑up TV cabinet and drop‑down cabinets: For ultimate invisibility, place the TV inside a cabinet with a motorized lift. Press a button and the TV rises from a credenza or drops down from the ceiling. These mechanisms are more expensive but perfect for minimalist spaces, bedrooms, and those looking for small living room TV ideas. Mirrored TVs and art screens: A mirror TV combines a flat‑panel display and a specially coated two‑way mirror. When the screen is off, it looks like a regular mirror; when it’s on, it serves as your TV screen. The Samsung Frame and similar models display art when idle, blending into gallery walls. 🤔 MantelMount perspective: Compare costs — the Frame starts around $1,000, while Samsung Frame alternatives for existing TVs cost less. TV integration techniques Gallery walls: On the flip side, you could always decorate around your TV: Surround it with framed art, photographs and mirrors. Keep the frames within a similar color palette and vary sizes for interest. The TV should sit centrally, and the total arrangement should extend beyond the TV’s width to make the screen feel intentional. Framing your TV: You could add a custom or DIY frame around your TV to reduce the visual contrast between the TV and wall. Thin bezels make this easier. Match the frame to your furniture for a cohesive look. Built‑in shelving: Flank your TV with bookshelves or display cabinets. Paint them the same color as your walls so the TV recedes into the composition. Hide cables within the wall or use cord covers painted to match. Should you hide your TV at all? Not every designer advocates hiding the TV. In family rooms where convenience and comfort matter, disguising the screen may be unnecessary. 🧠 Expert opinion The key is to balance form and function — to choose a solution that reflects how you use the space: In a dedicated movie room, leave the TV exposed and focus on seating and acoustics In a formal living room, hide the TV behind panels or artwork Balancing technology and aesthetics Experiment with TV gallery walls, custom frames, a mirror TV or a motorized solution to find the perfect fit for you. For more inspiration, compare Mantelmount solution-based TV mounts. Frequently asked questions How can I hide or camouflage my TV?Use sliding TV panels, pop‑up TV cabinets, mirror TVs or art screens to conceal your TV. Can I incorporate a TV into a gallery wall?Yes — center your TV within a group of art and photos, matching frame colors and sizes to create cohesion. Should I leave the TV visible or hide it?It depends on room function. In casual spaces, a visible TV is fine; in formal rooms, concealing it can improve aesthetics.

What Should You Put Under Your Wall-Mounted TV?
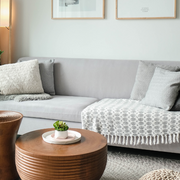
What Should You Put Under Your Wall-Mounted TV? Mounting your TV on the wall frees up floor space, but the blank wall underneath often feels… unfinished. In this guide, learn how to choose the right piece of furniture for under a wall‑mounted TV and design the perfect TV room for time with friends and family. Media consoles and cabinets A media console is probably the most popular choice, because it anchors the TV visually and provides storage for remotes and boxes. When selecting a console, aim for one that is at least as wide as your TV so the arrangement looks balanced. If you prefer a built‑in look, choose a console with closed cabinets on either side and open shelves in the middle to hide clutter. 🔥 Some consoles incorporate electric fireplaces — you can even customize the flame colors, adjust brightness and add heat. Floating shelves and cabinets For a minimalist feel, floating shelves or floating cabinets can replace a traditional console. Consider painting the wall behind them a dark hue or adding a slatted panel so the TV and shelves recede visually. Shelving: Mount two or three shelves beneath the TV to display books and decorative objects. Cabinets: These add hidden storage while maintaining a sleek profile. Be sure to reinforce them with proper wall anchors and run cables through paintable cord covers or raceways for a tidy appearance. Benches, credenzas and fireplace stands If your living room is more casual, try a bench or low credenza. These offer both seating and storage. Choose a piece with drawers or baskets to conceal remotes and gaming controllers. A low wooden bench styled with pillows and a folded throw adds warmth. Alternatively, a fireplace TV stand combines a console with an electric fireplace, delivering ambiance along with storage. Cable management and safety Nothing ruins a stylish setup faster than dangling wires. Hide cables by installing an in‑wall power kit (be sure to use UL‑listed components) or use surface‑mounted raceways that can be painted to match the wall. Loop excess cord length inside the console or use velcro ties to keep everything tidy. If you choose floating shelves, mount an outlet behind the TV so the power cord disappears into the wall. 🧠 MantelMount Pro Tip Want to put something under your wall-mounted TV, but still be able to watch TV at eye-level? MantelMount has the solution — our mounts come forward off the wall 15-20 inches and then down another 24-29 inches to eye-level. Now you can have both. Styling and décor tips Once your furniture is in place, add decorative elements to make the TV area feel intentional. Tips here include: Surround the screen with bookshelves to prevent it from dominating the room, or balance the black rectangle of the TV with other dark accents such as vases or lamps. Install soft backlighting behind built‑ins to ensure the TV isn’t the only light source on the wall. Create a niche with closed cabinetry below and open shelves on either side, using a patterned backdrop to draw the eye when the TV is off. Style consoles with books, plants, art and baskets to conceal accessories and add texture. Frequently asked questions How wide should a console be compared with my TV? Ideally, choose a console equal to or slightly wider than your TV for a proportional look. For example, a 55‑inch TV (which measures roughly 48 inches wide) pairs well with a 60‑inch console. Are fireplace TV stands safe for electronics? Modern electric fireplaces are designed for media use. Make sure to choose one with adjustable heat and built‑in ventilation, so you can enjoy the ambiance without overheating your devices. Can floating shelves hold heavy equipment? Floating shelves must be anchored to studs or use heavy‑duty brackets rated for the load. For heavier receivers or game consoles, a floating cabinet with internal support is safer. How do I hide cords under a wall‑mounted TV? Use UL‑listed in‑wall cable kits for power and HDMI. Surface‑mounted cord channels are a non‑invasive alternative; they adhere to the wall and can be painted to match. Create the perfect space for family and friends Filling the space under a wall‑mounted TV can help make your entertainment room into a cozy, welcoming space. Remember to always measure carefully and hide your cables for a clean look. >> Compare MantelMounts: Side-by-side features and specs

Turn a Wall-Mounted TV Into a Second Monitor for Your Home Office
Turn a Wall-Mounted TV Into a Second Monitor for Your Home Office Working from home used to mean making do with whatever equipment you had on hand. Today, the technology and design options are simply too amazing to settle for some haphazard home office. Top of the upgrade list: Turn a wall-mounted TV into a second monitor for your home office. The increased digital real estate can be a huge boost to your comfort, efficiency and productivity. This guide shows you how to use your TV as a second monitor. First step: Consider pixel density Compared to monitors, televisions typically have lower pixel density and higher input lag, so small text can appear fuzzy and mouse movements may feel sluggish. MantelMount Perspective Consider a modern 4K TV between 40 and 43 inches with a “PC” or “Game” mode. These help address these issues by offering sharper images and lower latency. Do you plan to sit at a desk? If yes, pick a screen with an adjustable VESA-compatible mount, and mount it so the center is at eye-level. This reduces neck strain. Use a full-motion or tilt mount so you can angle the display downward for comfortable viewing. Connecting the TV Most computers include an HDMI port; otherwise, use a DisplayPort-to-HDMI adapter. Aim for a viewing distance of about an arm’s length; a 40-inch 4K TV looks crisp at 2-3 feet. Lighting matters, so avoid glare by placing the screen away from windows and use ambient lighting to reduce eye fatigue. MantelMount Pro Tip MantelMount TV mounts are designed for TVs 45-90 inches. Our customers appreciate that a 45-inch screen covers the mounting hardware, so consider that if you’re making a fresh purchase. If you crave more clarity than your old TV can provide, consider investing in a purpose-built monitor. Monitors are designed for close-up work and often include ergonomic stands. Compare MantelMount’s Pull-Down TV Mounts Experiment with different input methods A simple HDMI cable will mirror your computer’s output with virtually zero latency, but you can also connect wirelessly through technologies like AirPlay or Chromecast if your devices support them. Wireless connections reduce cable clutter and make it easier to reposition your workspace. Whatever method you choose, be sure to adjust the display settings on your computer. Enable ‘game mode’ TVs are designed for movies, not spreadsheets, so enable “game mode” to reduce input lag and disable image processing features like motion smoothing that can cause text to appear blurry. If needed, you can then tweak the resolution and scaling settings in your operating system to ensure text is easy-to-read from your work station. Ergonomics If using a wall-mounted TV as a second monitor, proper ergonomics is vital to your long-term comfort. We recommend: Position the center of the TV at or slightly below your eye-level when seated (to minimize neck strain). If the TV sits higher on the wall, invest in a tilting mount and angle the screen downward. Keep the top of the screen no higher than 15 degrees above your seated eye line. Pay attention to viewing distance. A 40 to 55-inch TV works best at around 5 to 8 feet away, whereas a 65-inch display may require 9 feet or more for the greatest clarity. Adjust your desk and chair so your neck remains neutral and your eyes are level with the centre of the screen. Don’t overlook sound Many wall-mounted TVs include decent speakers, but you may prefer using external speakers or a soundbar for clearer audio. If you join frequent video calls, a dedicated microphone and headset can prevent feedback and echo. A note about virtual meetings and webinars Using a wall‑mounted TV as a monitor means you can see your colleagues at near life-size, making eye contact feel more natural. To do so: Pair your TV with a webcam mounted above the screen to mimic the eye-line of a real conversation. During presentations, cast your slides to the big screen and use your laptop for notes and control. Upgrade your home office with a wall-mounted TV Whichever display you choose, proper installation and thoughtful ergonomics will turn a wall‑mounted TV screen into a powerful upgrade for your home office. Need more tips for home office or home theater setup? Check out the MantelMount blog!

Is Dolby Atmos at Home Worth It? Plus Setup Tips
When Dolby Atmos first hit theaters in 2012, its overhead sound effects blew people away. Today you can bring that same sense of height and dimension into your living room. But is Dolby Atmos worth it? Let’s figure out if this setup is right for you. In this guide, we explain the technology and the gear you’ll need to install Dolby Atmos at home. What is Dolby Atmos? Traditional surround sound assigns audio to fixed channels (left, right, center, surrounds). Atmos is object‑based. Sounds are encoded as objects that can be placed anywhere in a three‑dimensional space, including above your head. Your Atmos receiver or soundbar uses this data to map sound to your specific speaker setup. The result: rain falling from the ceiling, jets flying overhead and footsteps moving realistically through your room. To enjoy Atmos at home, you need three things: A compatible playback device Atmos‑encoded content Speakers or a soundbar capable of reproducing height effects First consideration: Do your devices support Atmos? Many TVs, phones, tablets and laptops with HDMI eARC support Atmos passthrough. Apple TV 4K, Amazon Fire TV Cube and Xbox Series X all decode Atmos streams. Keep in mind: Your TV’s built‑in speakers can’t create height effects; you’ll need a receiver with Atmos decoding and additional speakers, or a purpose‑built Atmos soundbar. Sources of Atmos content Atmos isn’t limited to Blu‑ray. Streaming platforms like Netflix, Disney+, HBO Max and Apple TV+ offer Atmos‑encoded movies and shows. Many games on Xbox Series X|S and PlayStation 5 also support Atmos. Look for the Dolby Atmos logo in the audio settings and ensure your streaming subscription includes higher‑tier audio. Speaker and soundbar setups A basic Atmos setup adds two height channels to a 5.1 system (making it 5.1.2). You can mount ceiling speakers slightly in front of your listening position and another pair behind you, spaced like your front left/right speakers. Up‑firing Atmos modules that reflect sound off the ceiling are a convenient alternative. For 5.1.4, you add two pairs of height channels. Soundbars with upward‑firing drivers simulate height effects; position them under your TV with the bar close to a flat ceiling so sound can bounce down. Is Dolby Atmos worth it? There’s no doubt that Atmos elevates your viewing experience. Overhead cues make action scenes feel more realistic, and Atmos‑mixed music creates a dome‑like soundstage. But the benefits depend on your room and habits. MantelMount perspective 🤔 For movie-lovers and gamers, the immersive upgrade is significant. If you mainly watch news or sitcoms, Dolby Atmos may be unnecessary. Small apartments with low ceilings may not get dramatic height effects. Consider your budget — adding two height speakers and an Atmos‑enabled receiver may cost several hundred dollars, while Atmos soundbars start around $400. Upgrade paths and cost If you already own a modern AV receiver, check whether it supports Atmos via firmware. Many models sold in the last five years include Atmos decoding. Cost-wise: Adding two ceiling speakers is the most affordable route; expect to spend $200–$300. Atmos soundbars with up‑firing drivers range from $400 to $1,500. A full 5.1.4 system with four height channels and a new receiver could run more than $1,200. Bring the thrill of overhead sound into your home By ensuring your devices are compatible and choosing the right speaker configuration, you can enjoy movies and games the way sound designers intended. If you’re just beginning to design your TV/gaming space, check out our pull-down TV mounts — they turn any room into a true home theater experience. Frequently asked questions Which devices support Dolby Atmos?Recent TVs and streaming boxes with HDMI eARC, such as Apple TV 4K and Xbox Series X, can pass Atmos soundtracks to a compatible soundbar or receiver. How can I experience Atmos at home?Subscribe to a service that offers Atmos content, connect an Atmos‑capable playback device to a receiver or soundbar, and set up height speakers or a soundbar with up‑firing drivers. Is Dolby Atmos worth it?Atmos delivers more immersive sound but isn’t essential for everyone. Evaluate your room size, listening habits and budget before upgrading.

How to Build a DIY Home Theater in a Weekend
Looking to create a phenomenal home theater setup without a huge budget? DIYers can transform a spare room or basement into a home theater over a weekend. Find out what to buy, how to set it up and where you can save money without sacrificing quality. Day 1 – Measure your space and set a budget Decide where your screen will go and how many people you want to seat. The unofficial home theater seating distance rule here: The viewing distance in feet should be about twice the screen size in inches. This helps you choose between a 65‑inch TV and a 100‑inch projector screen. For your budget, allocate roughly: 40% to the display 30% to sound 20% to seating and décor 10% to accessories For tight budgets, a 65‑inch TV and a Dolby Atmos‑enabled soundbar cost around $700. For more immersion, consider a short‑throw projector and a 100‑inch screen (around $900) paired with a 5.1 speaker package. 🛒 You’ll also need speaker wire, mounting hardware, blackout curtains and LED strips. Day 2 – Install and wire Mount the screen. Secure your TV or projector screen at eye level when seated. If using a projector, ensure the throw distance matches your model. Arrange speakers. For a 5.1 setup, place front speakers at ear height on either side of the screen and angle them toward the seating area. Mount surround speakers to the sides at ear level or slightly above, and put the subwoofer near a wall to reinforce bass. If you’re using a soundbar, center it below the screen. Run cables. Hide speaker wires by running them along your baseboards or behind crown moulding. Use color‑coded banana plugs to simplify connections. For a wireless soundbar, just connect power and HDMI eARC. Test and calibrate. Run your receiver’s auto‑calibration or the soundbar’s setup routine. Adjust speaker distances and levels until the dialogue and effects feel balanced. Day 3 – Comfort and finishing touches Seating: Add a couch and/or chairs using the ideal seating distance formula above. For extra seating, add bean bags or floor cushions. If budget allows, build a simple riser from 2×8 lumber and plywood to create a second row. Lighting: Hang blackout curtains to darken the room. Install LED strip lights behind the screen or along the ceiling to create a soft glow. Connect them to smart plugs so you can dim lights from your phone. Décor: Add movie posters, a snack cart, acoustic panels disguised as art, etc. If noise leakage is an issue, weather‑strip the doors and add a rug to absorb sound. Read More >> How to Make Your Living Room Feel Like a Home Theater Home theaters on a budget - you can do it Building a home theater in a weekend is achievable. And then you can tell all the naysayers that you did it! When you’re ready to upgrade further, check out our pull-down TV mounts that turn any room into a home theater experience. Frequently asked questions What is the ideal home theater seating distance?Multiply the diagonal screen size by two to estimate seating distance (e.g., 65″ × 2 = ~11 ft). How do I build a home theater on a budget?Prioritize a good screen and sound; use inexpensive seating and DIY décor. Soundbars offer decent audio at a lower price than separate speakers. Where should I place surround speakers and subwoofers?Mount surround speakers at ear height or slightly above and put the subwoofer along a wall; avoid corners, and experiment for best bass.

TV Tip‑Overs and Kids: What Every Parent Needs to Know
You might not think a television could harm your child, but the tragic truth from Safe Kids Worldwide is this: Every three weeks a child dies from a TV tipping over, and every day, 10 kids go to the ER because of a TV tip-over. TVs are top-heavy. If you put one on a narrow stand or dresser, they become unstable — and of course, children sometimes climb furniture. They might pull the TV forward while trying to reach remotes or toys. Older CRT televisions are even heavier and can cause serious injuries when they fall. These accidents are preventable. In this guide, we explain how to anchor your TV to prevent tip-overs and other ways to keep your children safe at home. How to prevent your TV from tipping over The safest option is to mount your TV to the wall, following the manufacturer’s instructions. Use a sturdy bracket rated for your TV’s size and weight. If wall‑mounting isn’t possible, anchor the TV to the stand with TV safety straps. Secure furniture and cords Anchor dressers, bookcases and TV stands to wall studs using L‑brackets or anti‑tip kits. Move heavy items low: Place heavy objects like gaming consoles and DVD players on lower shelves to lower the center of gravity. Hide or secure cords: Bundle cords together and use cable covers to keep them out of sight. Avoid placing remotes or toys on top of TVs or high shelves where children might climb. About those old CRT TVs If you still use a CRT television, position it on a low, wide piece of furniture. Secure the TV with straps to prevent sliding. When choosing a TV stand, select a model with a broad, stable base. Avoid tall and narrow cabinets. Child safety and TVs: Teach and supervise Explain to children that TVs and furniture are not climbing toys. Set rules about not playing near the TV and always supervise toddlers in rooms with TVs. Make sure to educate caregivers and babysitters about the importance of keeping children away from unsecured equipment, too. TV tip‑over accidents are tragic and avoidable By anchoring your TV and furniture, managing cords and teaching children about safety, you can protect your family from a preventable hazard. Want more great ideas on how to make the most out of TV time with your family? Check out the MantelMount blog. Frequently asked questions How common are TV tip‑over accidents?A child dies approximately every three weeks from TV tip‑overs, and 10 children visit the emergency room every day, according to Safe Kids Worldwide. How can I secure a TV to prevent tip‑overs?Mount flat‑screen TVs to the wall or anchor them to furniture using anti‑tip straps. Follow the manufacturer’s instructions and ensure screws are driven into wall studs. What furniture safety measures prevent TV tip‑overs?Anchor bookcases, dressers and TV stands to the wall, move heavy items to lower shelves, hide cords, and recycle old TVs to reduce risk.

Surround-Sound Speaker Placement: The Complete 5.1 & 7.1 Setup Guide
No one wants to invest in speakers and receivers only to have their movies sound flat. In most cases, the culprit is placement. Where you position each speaker, how high you mount it and which way it faces determines whether your room becomes a phenomenal home theater or just a noisy living room. Learn the optimal placement for 5.1 and 7.1 systems, so you get the full impact of surround sound. Why placement matters A surround‑sound system splits audio into multiple channels. Each speaker is designed to handle specific frequencies and deliver effects from precise directions. When speakers are misaligned, voices and effects smear together and the bass becomes muddy. Proper surround sound speaker placement ensures clear dialogue, accurate sound staging and a better overall experience. Understanding surround‑sound layouts A 5.1 system includes five speakers (front left/right, center, surround left/right) plus a subwoofer. A 7.1 system adds two rear surrounds for an even more enveloping field. Modern receivers also support 5.1.2 or 5.1.4 Atmos layouts that add ceiling or upward‑firing speakers for height effects. Layout Speaker channels Suitable for 5.1 Front L/R, center, surround L/R, subwoofer Most living rooms and small theaters 7.1 Adds rear surround L/R Larger rooms where rear speakers can be placed behind seating 5.1.2 / 5.1.4 Adds one or two pairs of height channels Dolby Atmos content; dedicated theaters How to place front and center speakers Position your front left and right speakers roughly three feet from the sides of your TV and angle them 22–30 degrees toward the listening seat. The tweeters should be at ear height when you’re seated. Place your center channel directly above or below the TV — whichever location allows the drivers to be at ear level. Secure the speaker to prevent vibrations and ensure that the dialogue comes from the screen, not from below your coffee table. How to place side-surround speakers Surround speakers create ambient effects, such as rustling leaves or passing cars. In a 5.1 system: Mount them to the left and right of your seating position at 90–110 degrees and 2–3 feet above ear level. Point them directly at the listening area to maximize clarity. If side placement isn’t possible, move them slightly behind your couch and angle them toward you. Use sturdy wall brackets or tall stands to achieve the proper height. How to place rear-surround speakers (7.1 systems) A 7.1 layout adds two speakers behind your seats. Tips for placing them include: Mount them at ear height and angle them 135–150 degrees toward the listener. Keeping them at a similar height to the side surrounds ensures a cohesive sound bubble. If your seating backs onto a wall, try slim speakers mounted high on the wall and angled downward. Subwoofer placement Bass is omnidirectional, but placement still matters. Start by placing the sub along a wall, which often reinforces low‑frequencies. Avoid corners, which can cause boomy, muddy bass. Try the “subwoofer crawl test” — put the sub in your listening position and play a bass‑heavy track, then crawl around the perimeter of the room and listen for the spot where the bass sounds the smoothest. That’s where your sub should go. For large rooms, consider adding a second sub to even out bass response. Advanced speaker placement and tricky rooms Open floor plans and corner TVs can be challenging. Some tips to get it right: In L‑shaped rooms, pull seating slightly away from the wall and use the 5.1 guidelines. If your TV sits in a corner, you may be better off with a high‑quality soundbar or 3.1 system. For Atmos systems, mount ceiling speakers slightly in front of and behind the listener with spacing similar to your front left/right pair. Transform your movie nights — without buying new gear — by optimizing speaker placement in your home theater. Need more tips for home theater setup? Check out the MantelMount blog! >> Learn More: How to Make Your Living Room Feel Like a Home Theater Frequently asked questions How high should surround speakers be? Mount side surrounds at least 2 feet above seated ear level to create an enveloping sound field. Where should I put the subwoofer? Place the sub along a wall or next to the front speakers. Avoid corners and move it around until you hear tight, even bass. What angle should rear speakers be at in a 7.1 system? Angle rear surrounds 135–150 degrees toward the listening area.

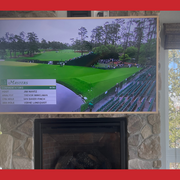
Hosting Football Season with the Perfect View: Why a Full-Motion TV Mount Is a Game Changer
Fall means football. When the weather cools down and leaves start changing, it means that Saturdays become battlegrounds for heated rivalries and Sundays are where the best in the business prove their worth. Whether you’re hosting a living room full of friends, gathering family for the big game, or watching solo as your team finds another creative way to break your heart, one thing is certain: you want the best seat in the house. Your TV becomes the center of the universe on gamedays and a full motion TV wall mount can make all the difference. With a MantelMount, you don’t have to fight over the one “perfect” spot on the couch. Everyone gets the best view, no matter where they sit, stand, or pace nervously through the fourth quarter. Why TV Placement Matters During Football Season Football isn’t just something you throw on when you’re bored. It’s an event, an American institution. Friends spread out across couches, recliners, bar stools, and even on the floor. Family members wander in and out of the kitchen for snacks. Some fans watch every snap, while others are more interested in the commercials or halftime show. But no matter what, the TV is the portal into the game we all love. If your TV is fixed in place, odds are only a handful of people get a clear, comfortable view. Others deal with glare, awkward angles, or a TV mounted too high over the fireplace that leaves them with a stiff neck by halftime. When the game is on the line, that’s the last thing you want. How a MantelMount Changes the Game MantelMount’s pull-down mounts give you flexibility that a fixed mount simply can’t provide: Pull Down to Eye Level: If your TV is mounted above the fireplace, you can lower it to the perfect height for long viewing sessions. Swivel and Tilt: Adjust the angle to cut down glare from sunlight during afternoon kickoffs or from your fireplace in the evening. Wide Viewing Angles: Whether friends are on the couch, perched at the kitchen island, or standing in the back to yell at the refs, everyone can see the play clearly. This makes MantelMount the best articulating TV mounts for game day, ensuring no fan misses the action. For College and Pro Fans Alike College Football Saturdays: Rivalry games, upsets, and endless matchups mean you could be watching from noon until midnight. Comfort is key when your team is in double overtime. NFL Sundays: From early games to Sunday night football, you’re parked in front of the TV all day. A MantelMount lets you adjust your setup so you can settle in without sore shoulders or strained eyes. Whether your living room turns into the neighborhood tailgate or you’re silently enduring another rebuild year alone, a full motion TV wall mount makes every snap easier to watch. Beyond the End Zone: Benefits After Football Season While Football is what a lot of us fans live for, MantelMount isn’t just for game day. Once the season ends, you’ll appreciate the flexibility for: Movie marathons during cozy winter weekends. Streaming your favorite fall TV shows. Holiday gatherings when everyone wants a view of the parade or big family movie. A MantelMount is an upgrade that keeps delivering all year round. Why MantelMount Is the Best Choice Not all mounts are created equal. MantelMount is specifically engineered for TVs above the fireplace, with features that make it stand out: Smooth, counterbalanced motion so adjustments are easy and safe. Generous range of motion — pull down, swivel, and tilt to fit any viewing need. Built with premium materials for durability season after season. Designed to blend into your living room while delivering pro-level functionality. Fall football is about shared experiences with all the highs, the heartbreaks, and everything in between. With MantelMount, you don’t have to worry about bad angles, glare, or fighting over the only good seat. Every fan gets the best view, whether they’re cheering, complaining, or stress-pacing in the fourth quarter. Upgrade your setup this season with a MantelMount full motion TV wall mount and make your home the ultimate game-day destination. Oh and make sure you wash that “Lucky Jersey” sometimes.

Top 10 Home Theater Upgrades to Elevate Your Viewing Experience
Ready to take your home theater from basic to jaw‑dropping? In this guide, we examine the best home theater upgrades with the greatest impact per dollar — so you can learn how to prioritize your improvements and create a cinema‑like experience at home. 1. Upgrade your screen: Projector vs TV The screen is the heart of any home theater. If you’re setting up in your regular living room: A large 4K OLED or QLED TV should provide sufficient brightness and color. Use the viewing‑distance rule: distance (ft) ≈ screen size (inches) × 0.6 So, a 75‑inch TV is ideal for a 7–9 ft seating distance. If you have a dedicated, darkened home theater room: Consider a projector with an ambient‑light‑rejecting (ALR) screen, which can give you a 120‑inch picture for a similar price. Modern ultra‑short‑throw projectors sit close to the wall and pair well with ALR screens. 2. Upgrade your sound: Soundbar vs surround sound Sound is half the experience. For small rooms: Soundbars offer simplicity and are perfect for small rooms, delivering clear dialogue and virtual surround effects. Add a wireless subwoofer on the floor near a wall for deeper bass. For larger spaces: Invest in a 5.1 or 7.1 speaker system with a separate receiver. This provides more precise placement of effects and is easier to upgrade later. If you start with a soundbar, choose one with Dolby Atmos for future‑proofing. 3. Seating comfort: Recliners and tiers This suggestion is driven by comfort — chuck the couch and get some home‑theater recliners with cup holders, USB chargers and power recline. Motorized recliners with heating and ambient lighting are luxurious upgrades worth considering; basic models start around $600 per seat, while high‑end options exceed $1,500. Add a second row on a riser platform so everyone can see. 4. Acoustic treatment Bare walls and hard floors create echoes. To optimize acoustics: Install home theater acoustic panels on the side and rear walls. Add a thick rug. Use blackout curtains. Acoustic panels come in decorative designs, so they enhance aesthetics, too. 5. Lighting control Proper lighting enhances immersion and reduces eye strain. Use smart dimmers to fade lights during previews and brighten them after the movie. Add LED strip lights behind the screen or along risers to create a cinematic glow. Once again, blackout curtains are the way to go. 6. Calibration Even the best TVs benefit from some tweaks every now and then: Adjust brightness, contrast and color to match your environment. Many TVs have a “Filmmaker Mode” that approximates calibrated settings. For projectors, align keystone and focus. Run your receiver’s auto‑calibration to set speaker distances and levels accurately. 7. Smart control and automation Here’s a relatively easy home theater upgrade you can make — simplify everything with a universal remote or smart‑home system. This enables you to control your TV, receiver, lights and blinds from one interface. You can even use automation to lower lights when you press “Play” and raise them when you hit “Pause.” 8. Streaming & source upgrades Invest in a 4K Blu‑ray player or a fast-streaming box (Apple TV 4K, Roku Ultra) for reliable playback and access to Dolby Atmos content. You can also upgrade your HDMI cables to certified ultra‑high‑speed versions to support HDR and 4K @ 120 Hz. 9. Add a second subwoofer A single subwoofer can produce uneven bass. Adding a second sub fills in gaps and balances low‑end response. Place one sub at the front of the room and the other halfway down a side wall or in the rear. Your receiver can calibrate both. 10. Finishing touches Add movie posters, shelving, and maybe even something fun like a popcorn machine. Make the space your own! Upgrading your home theater doesn’t have to be overwhelming Take it upgrade-by-upgrade, prioritizing screen size, sound quality, comfort and acoustics. MantelMount offers pull down mounts and accessories that allow movie-lovers to lower their TV to proper eye level and swivel left or right. This makes for an unmatched movie-watching experience! Compare MantelMounts today. Frequently asked questions What are the best upgrades for a home theater?The most impactful upgrades are a larger screen, improved sound (soundbar or surround system), comfortable seating and acoustic treatments. How do I choose the right TV size?Measure your seating distance and multiply by 0.6 to find an ideal screen size. Do I need a soundbar or surround sound?Soundbars are ideal for small rooms and simple setups; surround systems offer better immersion in larger spaces.

Ultimate Guide to Mirror TVs & Hidden Television Solutions
A lot of us can remember when the family TV was this big dusty monstrosity, demanding all the attention in the living room. Today, we have tasteful solutions that hide TVs, so they don’t need to be the focal point of any room. This guide explains the types of hidden televisions, how mirror displays work and more. Hidden Television Types When it comes to disguising a TV, there are plenty of clever solutions. Each one balances form and function differently, depending on whether your priority is visual minimalism, flexible positioning, or a flush-to-wall appearance. Mirror TVs A mirror TV is exactly what it sounds like: a fully functional mirror that transforms into a television when powered on. This solution is especially popular in bathrooms, bedrooms, and formal living rooms where a large black screen might feel intrusive. The TV itself disappears behind a reflective surface, keeping the room’s aesthetic intact until entertainment is desired. Pop-Up and Lift Cabinets Another popular approach is to hide a TV in a piece of custom furniture. Motorized lift cabinets allow the television to rise into view when needed and disappear back inside when turned off. This works well in open-concept living rooms or bedrooms, where a freestanding cabinet doubles as both storage and concealment. Art and Sliding Panels Some homeowners prefer to conceal their television behind sliding wall panels, artwork, or decorative screens. This approach can blend perfectly with a design-forward interior. A framed painting that glides aside or retracts is a more creative alternative for those who want to add some drama to the reveal. Flush and Recessed Mounts For those who want to minimize the footprint of the hardware itself, recessed mounting accessories provide an elegant solution. MantelMount’s RB100 Recess Box is one such option. Installed between wall studs, the RB100 allows the center arm of a MantelMount to fold directly into the wall. The result is a slim 1.8-inch flush-to-wall appearance when the TV is raised. It is compatible with several MantelMount models (MM340, MM540, MM700, MM815) and includes paintable covers so the installation blends seamlessly with any wall finish. This type of setup appeals to homeowners who value a “barely-there” look. The mount arm is hidden inside the wall cavity, which makes the television feel almost built-in. For maximum concealment, this is one of the cleanest hardware solutions available. What Is a Mirror TV? A mirror TV combines a flat‑panel display and a specially coated two‑way (or dielectric) mirror. When the screen is off, it looks like a regular mirror; when it’s on, the TV image shines through, thanks to a balance of two things known as reflectance and transmittance. Premium models use ultra‑clear dielectric glass for brighter images, making them indistinguishable from a regular mirror. MantelMount perspective If you plan to hang a mirror TV above a fireplace, proper mounting is crucial. Our motorized drop down and swivel TV mount lowers the display to eye level and swivels it left or right with the push of a button. This remote‑controlled mount maximizes picture quality and comfort, a perfect match for hidden televisions. How Mirror TVs Work: Glass Matters Two‑way mirrors use a semi‑reflective coating to reflect some light and transmit the rest. Dielectric glass adds multiple optical coatings, yielding brighter transmission and a more natural mirror appearance. Experts recommend: Standard two‑way glass for brighter rooms Dielectric glass for high‑end installations When looking for pull‑down mounts, keep the weight of the mirror TV in mind. We engineered our motorized drop down and swivel TV mount to: Handle heavier mirror TVs (45"–90", up to 115 lbs) Provide 26 inches of vertical drop and 30° of swivel If you prefer a manual solution, try an enhanced pull‑down TV mount. It offers 27 inches of vertical travel, 30° swivel and heat‑sensing handles. Mirror TV Design & Customization When it comes to sizes and styles, there’s practically nothing you can’t find in a mirror TV. Luxury brands like Séura offer over 100 frame styles and let you pick the TV’s position and frame material. When designing your mirror TV: Choose the glass. Standard two‑way glass adds a slight tint; dielectric glass offers brighter picture quality. Select a frame: Options include modern metal frames, ornate wood frames and more. Consider waterproofing: Bathroom mirror TVs use anti‑fog glass and waterproof casings. MantelMount perspective If your mirror TV will be mounted above a fireplace or high on a wall, invest in a motorized drop down and swivel mount. It uses patented software and electronic actuators to automatically lower and swivel the TV using two memory presets. For a more budget‑friendly option, this enhanced pull down TV mount offers easy pull‑down, heat‑sensing handles and a built‑in soundbar attachment. Hidden TV Installation & Safety Proper mounting ensures that your hidden TV is safe and enjoyable. Look for: Eye‑level viewing. This mount lowers heavy mirror TVs to the perfect height and returns them to a flush position at just 5.1 inches from the wall. Remote control & silent operation. Find a remote that works without line‑of‑sight, and the custom actuators should deliver smooth, barely audible movement. Safety features: Find a model with heat‑sensing technology that warns you if the fireplace is too hot. Other important features include soft and hard travel stops to prevent the TV from hitting the wall or mantel, and an auto‑straightening feature that returns a swiveled TV to center when stowed. If you’re unsure about installation, you can always get your mount professionally installed. Mirror TVs Costs & Warranty Mirror TVs cost more than standard TVs because of specialized glass, frames and waterproofing. Expect to pay anywhere from $499–$12,000 for a mirror TV, depending on size and features. Look for quality products to protect this investment, including: Hidden TV mounts that can handle TVs up to 90 inches and 115 lbs Lifetime warranty on all mechanical parts and at least a five‑year warranty on gas springs Money‑back guarantee: MantelMount products are guaranteed for 90 days. If you’re not thrilled, return it for a full refund. MantelMount Solution-Based TV Mounts Ready to experience a hidden TV solution? Compare all MantelMounts to find the perfect mount for your home. FAQs & People‑Also‑Ask Answers Are mirror TVs any good?Yes. High‑quality mirror TVs use engineered glass that reflects like a mirror while allowing bright images to pass through. Brands like MirrorVue and Séura pair vivid 4K displays with elegant frames. Is there a TV that turns into a mirror?A mirror TV is exactly that: a television concealed behind a reflective surface. When it’s off, you see only the mirror; when it’s on, the TV images shine through. How do I mount a mirror TV above a fireplace safely?Use a mount designed for over‑fireplace installations. These come with remote controls to lower the display, heat sensors and travel limits (soft and hard travel stops that prevent the TV from hitting the wall or mantel). These safety features protect your electronics and your family. Do mirror TVs come with warranties?Mirror TV warranties vary, but MantelMount stands behind its mounts with a lifetime limited warranty and a 90‑day money‑back guarantee.

Gaming Den Setup Guide: TV vs Monitor, Cable management, and Lighting Ideas
Sure, you could park your console in any old room and call it a gaming den — but you’re not just any old gamer, are you? This is your castle, your getaway, your base camp. This is Ground Control. And it’s gotta be cool. You’re in the right place. This guide addresses the five main aspects of gaming den design, including: Choosing between a TV or a monitor Technical essentials Game room ergonomics Cable management Lighting and ambiance Build a gaming den that’s both immersive and comfortable — and worthy of the designation! TV vs monitor: Which is better? A TV offers a larger screen and couch‑friendly gaming, making split‑screen adventures and movie nights more fun. Modern gaming TVs now support variable refresh rates and AMD FreeSync, so screen tearing is less of an issue. However, monitors typically have faster response times (1 ms or less) and higher refresh rates, which is vital if you play competitively. Feature Gaming TV Gaming monitor Screen size 48–85 inches; immersive couch gaming 24–42 inches; suited to desk setups Refresh rate 60–120 Hz; many now support 120 Hz 120–240 Hz; ideal for fast shooters Response time 4–8 ms; improved on OLED models 1 ms or lower, reducing motion blur Connectivity HDMI 2.1 for 4K @ 120 Hz; often includes ARC/eARC HDMI 2.1 or DisplayPort; may lack ARC Use case Casual and cinematic gaming; couch co‑op Competitive gaming; multi‑tasking with PC MantelMount perspective Choose a TV if you value size and cinematic immersion Choose a monitor if you need speed and sit close to your screen 2. Technical essentials: HDMI 2.1 and specs New consoles like PS5 and Xbox Series X output 4K at 120 frames per second, but only if your display supports HDMI 2.1. Without it, you’re limited to 4K @ 60 Hz. Experts recommend: When shopping for a display, look for HDMI 2.1 ports, variable refresh rate (VRR) and low input lag For competitive gamers, a 144‑Hz monitor with 1 ms response time ensures fluid motion and crisp visuals 3. Creating an ergonomic desk setup We all know the aches and pains of a long gaming session, making comfort critical for your gaming den. Four things to consider: Invest in a height‑adjustable ergonomic gaming chair that lets you recline, tilt and raise/lower the seat Set your monitor so the top third of the screen is at eye-level and keep the screen about an arm’s length away Regularly change posture, use a footrest to help with circulation and positioning, and for console gaming on a TV, pair a low‑profile couch with lumbar cushions 4. Cable management: There’s a plan for that A tangle of wires ruins the look of any gaming space. Follow the five steps of gaming room cable management: Plan your layout. Decide where your PC, console, router and power strips will sit. Sort by function. Separate power cables, data cables and controller leads. Use sleeves or Velcro ties. Gather cables into sleeves to keep them tidy. Route them behind the desk (or whatever your gaming desk setup is). Run cables along the back and underside of your desk; use adhesive clips. Install a cable tray. Mount a tray beneath the desk to hold power strips and excess length. Even better: Mount your PC under the desk, use wireless mice and keyboards, and attach your monitor to an arm. 5. Lighting and ambiance Add RGB LED lighting strips behind your desk or TV to create a glow — not only does it look cool, but the glow helps reduce eye strain. You can also use bias lighting behind monitors to improve contrast. Acoustic panels and a plush rug dampen echoes, while LED Nanoleaf panels or posters personalize the space. Try pull down TV mounts for the ultimate experience Designing a gaming den means balancing performance, comfort and aesthetics. MantelMount offers pull down mounts and accessories that allow gamers to lower their TV to proper eye level and swivel it left or right for the perfect viewing/gaming angle. This makes for an unmatched gaming experience. Compare MantelMounts today. Frequently asked questions Should I use a TV or monitor for console gaming? Choose a TV if you value size and cinematic immersion; choose a monitor if you need speed and sit close to your screen. How can I manage cables in my gaming setup? Plan your layout, sort cables, bundle them into sleeves, route them behind your desk and use a cable tray. Do ergonomic gaming chairs improve comfort? Yes – chairs with adjustable height, tilt and recline support natural posture changes and reduce fatigue during long gaming sessions.